Jan
What to Do Before Your Lawn Goes In
Now that all the holiday decorations are down and you’re getting those tax refunds back it is time to make your outside space come to life. If you’re ready for the extreme yard makeover, and want to do it on a tight budget then follow my instructions and I will save you time and money. The tips I am going to lay out today will save you money now and down the road. For any of you who have had to do this two or three times you now know just how important the soil prep is to your lawn. 
So just how important is the soil prep? Soil prep is actually the most important step in the operation because having a compacted or poorly draining soil will result in a chlorotic lawn with a shallow root system. A shallow root system will end up costing you double in water, fertilizer, and every afternoon during the summer months you can bet it will be your lawn that needs water first. A properly prepped lawn will allow for a deep root system and even during the hot summer months allow you to water just 3 times week. I know some of you are watering 7 days a week and when you don’t you start to see your lawn shrivel up and that is a direct result of poor water infiltration and shallow roots. We need to learn to train the roots to grow deep and they cannot even begin that process if they can penetrate the soil.
Okay, the first step is going to be to rent a tiller and start to turn over the soil. This can be very time consuming if you have a clay soil or very rocky conditions but in those cases this is even more important. If you’re simply changing lawn varieties after a couple years or you just recently tilled your yard then you can skip this step but it is always good to do while the ground is exposed. Rototiller’s are available at most rental stores and you can expect to spend about $80-$100 to rent it for an entire day. The goal of the tiller is to turn the soil to a 6-8 inch depth. This can be quite the challenge in some parts of town so you may need to go a few directions to make this happen. As the rototiller’s teeth penetrate into the soil it will open up the soil surface which allows for better water and air infiltration. After turning the soil over one time and getting it to your desired depth you will want to mix 50 pounds per 1000 SF of gypsum into the soil and till it in. The gypsum is not a fast acting product but it will loosen the soil over time. The gypsum will work its way through the soil and help improve air flow into the ground. Gypsum is a relatively inexpensive product and you can apply more than 50 pounds if you have really poor soil conditions but be advised that it will take about 6-7 weeks to break down in the soil before it can react and help loosen the soil. you can expect to spend around $10-$15 for a bag of gypsum so this is a cheap part of the process.
Now that the soil has been loosened it is the perfect time to put in that state of the art irrigation system. Head down to a irrigation store like Sprinkler World and have them help you with the plans and layout for your backyard. Once you have laid out the system it is time to trench the yard. You will trench out the irrigation sysytem to about a 4-6 inch depth and lay the pipe from the water supply line to the valves. The number of valves necessary will depend on the amount of sprinklers, water flow, types of sprinklers, and spacing. I will not go into detail on this but I would advise for more information you visit your local irrigation store or consult a landscape professional to help carry out this step.
Once your sprinkler system has been put in it is best to leave the swing joints capped where the sprinkler heads will go until your final grade is established. Most of the soils in Arizona have a high clay content so it is best to create a better growing medium and sand is your best option. We generally have pretty poor soils in Arizona so it is nice to use a washed mortar sand or a higher grade sand with a mixture of medium fine sand particles to help with drainage and root growth. If you already have a sandy profile you don’t need to add any sand unless it is for leveling but try not to put a different type of sand over top that would create a potential layering issue. Lots of landscapers use wood mulch, a topper or sod mix and these are okay but remember that they hold water and that does not allow your roots to grow deep so sand is a better option.
One of the issues with mulch is it keeps moisture in the top of the soil profile which results in short roots becasue they don’t have to grow deep to get water. You can put down as much sand as you would like and the more the better, but an extremely sandy profile does limit your nutrient holding capacity so if you are going 6 inches or more I would incorporate a little peat in to the mix as well. You can go with a 85-90 percent sand mix that is 10-15 percent peat. After you have put the sand down you will smooth out the surface with a 2 x 4 or drag the area smooth with a mat. It is important to remember to water the sand for a couple days to fix any settling that may occur. When you’re establishing your finished grade remember that you should be ½ inch below where you will set your sprinkler heads. The sod you purchase will come with a 1/2″ of soil and with your sprinklers set 1/2″ above grade the grass will match up perfectly. Now that the sprinklers are in and the grade is done it is time to put down a starter fertilizer. A great starter fertilizer and a safe fertilizer to use throughout the year is the Soil Burst 5-10-15 available from Western Sod and West Coast Turf. You can order it from us directly or purchase it online at www.westcoastturf.com. This can be delivered with your sod and applied to the soil surface a few minutes before you put the sod down with the easy to use shaker cap. The Soil Burst should be applied at 10-20 pounds per 1000 SF as a starter fertilizer and can be used to feed your lawn throughout the year.
Once the soil is prepped it is time to select your sod. Remember to read about all the different types of grasses, maintenance requirements, and decide what works best for you. There are so many great choices for the desert southwest including several bermudagrasses including BOBSod or the popular new Seashore Paspalum.
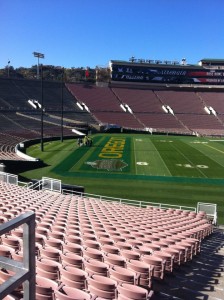
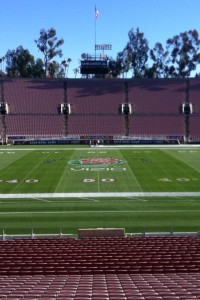
When the prep is all done and you order from West Coast Turf you can be assured to have a lawn that looks just like the field we put in before the Rose Bowl this year.


