Apr
Tips For Mowing Your California and Arizona Sod
Maintaining a lush, green lawn in the arid climates of Southern California and Arizona can be quite a challenge. It’s totally achievable though, with the right approach. Mowing plays a pivotal role in keeping your lawn healthy and attractive. Here are some tips on the best way to keep your lawn beautiful when mowing:
1. Choose the Right Mower: It is crucial to select the appropriate mower to achieve optimal results. For Southern California and Arizona, where lawns often consist of warm-season grasses like bermudagrass, Zoysia grass, or St. Augustine grass, consider using a rotary mower. These mowers are well-suited for cutting thicker grass types commonly found in warmer climates.
2. Adjust Mowing Height: Maintaining the correct mowing height is vital for the health of your lawn. In hot and dry climates, it’s recommended to keep your grass slightly taller to provide shade to the soil and retain moisture. Adjust your mower’s cutting height to leave the grass blades around 2 to 3 inches tall. Taller grass also helps to inhibit weed growth by shading the soil.
3. Follow the One-Third Rule: Adhere to the one-third rule that states
you should never remove more than one-third of the grass blade’s height in a single mowing session. Cutting more than this can stress the grass and make it more susceptible to drought and diseases. Aim to mow your lawn regularly to maintain a consistent height.
4. Mow When the Grass is Dry: Mowing wet grass can lead to an uneven cut and cause clumping, which can smother the grass beneath. Additionally, wet grass is more prone to tearing, resulting in an unhealthy appearance. Therefore, it’s best to mow your lawn when the grass is dry, preferably in the morning or late afternoon when temperatures are cooler.
5. Sharpen Mower Blades Regularly: Sharp mower blades ensure clean cuts, promoting healthier grass growth. Dull blades tear the grass instead of cutting it cleanly, leaving ragged edges that are more susceptible to disease. Check your mower blades regularly and sharpen or replace them as needed to maintain optimal cutting performance.
Alternate Mowing Patterns: Changing your mowing pattern regularly helps prevent soil compaction and encourages upright grass growth. Consider mowing in different directions each time you mow to avoid creating ruts and uneven wear on your lawn.
6. Leave Grass Clippings on the Lawn: Grass clippings are a valuable source of nutrients for your lawn. Instead of bagging them, leave them on the lawn to decompose. This practice, known as grasscycling, returns essential nutrients like nitrogen back into the soil, promoting healthy grass growth. For more information, visit westcoastturf.com
No Comment
Jan
A Guide to Repairing Patches and Bare Spots on Your California & Arizona Sod
Maintaining a lush and vibrant lawn in the California and Arizona desert areas can be challenging due to the arid climate and water restrictions. However, with the right knowledge and care, you can revive your lawn by addressing patches and bare spots effectively. Here are some practical steps to repair and rejuvenate your lawn. Southern California and Arizona are known for their hot and dry conditions, making lawncare a unique challenge. Patches and bare spots can result from various factors, including:
- Drought Stress: Limited water availability can lead to dry and bare areas in your lawn.
- High Temperatures: Intense heat can cause grass to wither and die, creating unsightly patches.
- Poor Soil Quality: Many areas in these regions have sandy or clayey soil, which may lack essential nutrients.
- Overuse of Fertilizers: Improper use of fertilizers can contribute to patchiness and bare spots.
- Foot Traffic and Compaction: High foot traffic can compact the soil, restricting grass growth.
Repairing Patches and Bare Spots:
- Watering Strategy:
Water deeply and less frequently to encourage deep root growth.
Invest in a smart irrigation system to optimize water usage based on weather conditions.
- Choose Drought-Tolerant Grass Varieties:
Opt for grass types like Bermuda that thrive in arid climates.
- Soil Improvement:
Consider using a soil aerator to alleviate compaction issues.
- Appropriate Fertilization:
Use a slow-release, balanced fertilizer to provide essential nutrients without causing excessive growth. Follow recommended application rates to avoid fertilizer burn.
- Overseeding:
Overseed the existing lawn with drought-resistant grass seeds to fill in bare spots.
Ensure good seed-to-soil contact by raking the area lightly after seeding.
- Mowing Practices:
Set your mower blade to the recommended height for your grass type.
Avoid cutting more than one-third of the grass height at a time to prevent stress.
- Adequate Shade:
Plant shade trees strategically to provide relief from the scorching sun.
Use temporary shade structures for vulnerable areas.
- Pest and Disease Management:
Keep an eye out for pests and diseases, as weakened grass is more susceptible. Use eco-friendly pest control methods to minimize environmental impact.
Repairing patches and bare spots in your lawn in desert areas in Southern California and Arizona requires a holistic approach that considers the unique challenges posed by the arid climate. By implementing water-wise practices, choosing appropriate grass varieties, and addressing soil health, you can enjoy a resilient and green lawn year-round. Stay committed to regular maintenance, and your lawn will become a thriving oasis in the midst of the desert landscape. For more information, visit https://westcoastturf.com
Comments Off on A Guide to Repairing Patches and Bare Spots on Your California & Arizona SodJun
Dos and Don’ts of Home Sod Installation
When installing California and Arizona sod for your home, there are several dos and don’ts to keep in mind to ensure successful establishment and healthy growth. Here are some guidelines to follow:
Do:
- Prepare the soil: Ensure that the soil is properly prepared before laying the sod. Remove any existing grass, weeds, rocks, or debris and loosen the soil with a rake or tiller. Level the surface to avoid uneven areas.
- Test soil pH: Conduct a soil test to determine the pH level and nutrient content of the soil. Adjust the pH as necessary by adding lime or sulfur to create an optimal growing environment for the sod.
- Water the soil: Before installing the sod, water the soil thoroughly to provide adequate moisture for the roots. This helps the sod to establish and promotes good root contact with the soil.
- Lay the sod promptly: Install the sod as soon as possible after delivery or purchase. Sod is a perishable product, and delaying the installation can lead to drying out or root damage.
- Lay the sod properly: Start laying the sod along a straight edge, such as a sidewalk or driveway, and work your way across the lawn. Butt the edges of each piece tightly against each other without overlapping, ensuring no gaps or spaces are left between the pieces.
- Water immediately: Once a section of sod is laid, water it immediately. This helps settle the soil, removes air pockets, and promotes contact between the roots and soil.
- Water regularly: Keep the sod moist by watering it regularly for the first few weeks after installation. Aim for deep watering to encourage the roots to grow deeper into the soil. Avoid overwatering, which can lead to shallow root growth and other issues.
- Mow with care: Once the sod has established and grown to the recommended height, mow it to maintain its appearance. Set the mower at the appropriate height and avoid cutting more than one-third of the grass blade length at a time.
Don’t:
- Don’t delay installation: As mentioned earlier, avoid delaying the installation of the sod. The longer it remains rolled up, the greater the chances of it drying out and deteriorating.
- Don’t stretch the sod: Avoid stretching the sod while laying it. This can cause the roots to separate from the soil, making it difficult for them to establish properly.
- Don’t leave gaps or overlaps: Ensure that the sod pieces are laid tightly against each other without gaps or overlaps. Leaving gaps can result in weed growth and uneven appearance, while overlaps can lead to uneven rooting and hinder growth.
- Don’t overwater or underwater: Striking the right balance with watering is crucial. Overwatering can suffocate the roots, encourage disease, and lead to shallow root growth. On the other hand, underwatering can cause the sod to dry out and wither.
- Don’t walk on the sod too soon: Avoid walking on or putting heavy objects on the newly installed sod for the first few weeks. This gives the roots time to establish and prevents damage to the delicate young turf.
- Don’t mow too short: When it’s time to mow, avoid cutting the grass too short. Scalping the lawn stresses the grass and weakens its ability to thrive.
- Don’t neglect maintenance: Once the sod is established, continue with regular maintenance practices such as watering, fertilizing, and weed control. Neglecting these aspects can lead to the deterioration of your lawn.
Remember, each sod variety may have specific care instructions, so it’s always beneficial to consult with a local expert or refer to the sod supplier’s recommendations for best results.
Comments Off on Dos and Don’ts of Home Sod InstallationJun
Essential Tips for Maintaining a Healthy Lawn While on Vacation
You look forward to getting out of town to relax on your summer vacation, but it’s important not to neglect your lawn’s health while you’re away. With a little planning and preparation, you can ensure your Arizona and California lawn stays vibrant and healthy even during your absence.
- Mowing and Trimming: Before leaving for your vacation, make sure to mow your lawn to an appropriate height. Cutting it slightly shorter than usual will help maintain its appearance for a longer period. Trim the edges to give your lawn a neat and well-maintained look.
- Watering: Proper watering is crucial for the health of your lawn. If you’re going away for a short trip (up to a week), deep watering just before leaving should be sufficient. However, for longer vacations, consider these options:
a. Automatic Sprinkler System: Install an automatic sprinkler system or set up timers to ensure your lawn receives adequate water. Adjust the settings based on your lawn’s needs and local watering regulations.
b. Seek Help from a Neighbor or Friend: Request a trusted neighbor or friend to water your lawn while you’re away. Provide them with clear instructions on when and how much to water and show them how to operate your irrigation system if necessary.
c. Slow-Release Watering Methods: Consider using slow-release watering methods, such as drip irrigation or soaker hoses, which gradually provide water to your lawn over an extended period. These methods can minimize water wastage and keep your lawn hydrated.
- Weed Control: Weeds can quickly invade your lawn and compete with grass for nutrients and sunlight. Prior to your vacation, apply a pre-emergent herbicide to prevent weed growth. Alternatively, hire a professional lawn care service to manage weed control in your absence.
- Fertilization: Proper fertilization promotes healthy grass growth and resilience. Apply a slow-release fertilizer a few days before your departure to ensure your lawn receives essential nutrients throughout your vacation. This will help maintain its health and vigor.
- Arrange for Lawn Care Services: Consider hiring professional lawn care services to take care of your lawn while you’re away. They can handle tasks such as mowing, watering, fertilizing, and weed control. Discuss your requirements and schedule with the service provider to ensure your lawn receives the necessary attention.
- Mulch Beds and Landscaping: If you have mulch beds or other landscaping features, ensure they are well-maintained before leaving. Mulching helps retain moisture and suppress weed growth, so replenish mulch layers if necessary. Trim any overhanging branches that could potentially shade or damage your lawn.
- Secure Outdoor Items: Before leaving, secure any outdoor furniture, toys, or equipment that may obstruct or damage your lawn during strong winds or storms. Store them safely or anchor them down to prevent them from causing damage.
By following these tips and making suitable arrangements, you can maintain a healthy lawn even while you’re on vacation. Planning ahead and enlisting the help of professionals or trusted neighbors will ensure that your lawn stays vibrant, weed-free, and well-hydrated during your time away. Return from your vacation to a lush, beautiful lawn that enhances the overall appeal of your home.
Comments Off on Essential Tips for Maintaining a Healthy Lawn While on VacationNov
West Coast Turf Wishes The Rose Bowl Stadium a Happy 100th Birthday
Friday, October 28, 2022 was the Official 100th Birthday of the Rose Bowl Stadium in Pasadena. At West Coast Turf, we are proud to provide them with their sod and we join them in celebrating one hundred years of being one of the most famous and beloved venues in sporting history.
Some fast facts: The Rose Bowl has a seating capacity of 92,542, making it the 16th largest stadium in the world, and the 11th largest in the United States. Best known as a football stadium, it’s been home to the UCLA Bruins football team since 1982 and has hosted 5 Super Bowl games (3rd most of any stadium). It’s also a notable soccer venue, as well as a concert venue for many of the most iconic and famous musicians – Michael Jackson, Pink Floyd, The Rolling Stones, U2, and Journey all played there, as well as Lilith Fair festival.
The Rose Bowl was designated a National Historic Landmark and a California Historic Civil Engineering landmark in 1922. Since 1993, West Coast Turf has been the proud providers of their turf that so many sports and teams have played on. We know that the grass you play on is one important aspect of what makes a stadium so popular, and we are honored to provide their Bermuda sod for them year after year.
To see our full client list, click on the About Us section.
Comments Off on West Coast Turf Wishes The Rose Bowl Stadium a Happy 100th BirthdayNov
Maintenance practices for your Arizona and California Sod
As we move into November it’s a safe assumption that if you were going to overseed you have done it by now or plan to in the next week or two. There is still time to get a winter lawn in if you would like, but its also beneficial to let your lawn go dormant for the winter. With so many new paint and dye options it makes the decision a little easier for homeowners to let their lawn go dormant and still have a green winter lawn. Today I want to talk about the next step in the overseeding process and also what to do if you decided to forgo overseeding this year.
Overseeded Turf
Fertilizer
Overseeded turf really benefits from front loading fertilizer during the grow in stage. You should have applied a starter fertilizer with your seed and if the lawn is 3-4 weeks along now you can give it another boost before the cooler temperatures arrive. Once you have mowed your ryegrass for the first time and feel like you have a good stand of grass, I recommend making that second application of fertilizer. While there are hundreds of choices on the market for fertilizers to use, I’m choosing to keep things simple so you’re not running all over trying to find different products.
Calcium Nitrate (15.5-0-0 on the bag) – Calcium nitrate is a great way to give your new ryegrass a kick start and help the tillering process. This can be applied up to 1 pound of nitrogen per 1000 SF. Remember the first number on the bag is the percentage of nitrogen in the bag. Therefore, this bag is 15.5% nitrogen. To apply one pound of nitrogen you need to divide .155/1 = 6.45 pounds of product equals one pound of nitrogen.
Ferrous Sulfate – Ferrous sulfate can help get your grass a deep green color and keep it that way when the temperatures cool off in late November. This is a water-soluble product that can be mixed in a hand sprayer with a ½ pound of product and 3-4 gallons of water. Spray this mixture over 1000 SF but keep it off walkways, concrete, paver, and anything you don’t want to get an iron stain on. I recommend having someone help you apply the product. You can have one person apply the product and another use a small piece of plywood of cardboard to block pavers, etc. I would wait until he ryegrass has been in at least four weeks before applying it. This can be applied every 14 days throughout the winter for strong color.
Balanced fertilizer – A couple other products that are readily available and will help your early season ryegrass are 15-15-15 or 21-7-14. I have seen both products at nurseries and the box stores.
The key is to get your ryegrass in good shape and strong before we get our first frost. This is typically around Thanksgiving but areas outside of town will get it sooner. Once we get a couple hard freezes the granular fertilizers provide less benefit to the grass and foliar fertilizers should be utilized. This is normally the case from December to February.
Watering
Once the ryegrass is established you can really cut back the water. Keep an eye on the soil moisture and the general look of the ryegrass. You will find you can go several days without water during the winter and the ryegrass won’t be affected. When you do water make sure its deep and you can easily push a screwdriver in the ground 6” after application. The easiest way to tell if your lawn needs a drink is the blueish grey tint on the plant or if you walk on it and the grass doesn’t bounce back up quickly. Never set your water to run daily, it does nothing for the grass except injure the root system and wastes water. Keep an eye on the forecast and shut off the system if rain is expected. We all need to do our parts to save water and getting a smart irrigation clock or monitoring for moisture will make a tremendous difference.
Non overseeded Turf
This is a great option for those that want to save water and maintenance time during the winter. Not only will your lawn be happy it got a rest, you wallet will also be happy. I recommend forgoing overseed every few years to give your lawn a break and have a full growing season.
If you still want to have a green winter lawn look at turf paints or dyes that are readily available online and through some distributors. Each product will have a different rate for application so read the label carefully and cover up any areas you don’t want to get paint on. Most of the paints are organic and safe for kids, pets, and to play on. If you have concern about a particular product, I recommend reading through their literature to find the right one for your family.
Since your lawn is not actively growing it does gives weeds a chance to come in and cause some issues. Its best to apply a pre-emergent such as Prodiamine on the entire lawn and this will give you 90+ days of control. This cannot be applied if you are still planning on overseeding this year. It MUST be done 6-8 weeks before seeding or you will not get the seed to emerge well.
Watering
There isn’t a particular watering schedule that must be maintained during the winter except to keep some moisture in the ground every 2-3 weeks. I leave my irrigation clock off all winter and hope there is some timely rain every few weeks. If we don’t get any rain, I will give my lawn a good drink and start the process over again. This can be done until March when the gras sis starting to green up again and the temperatures is rising.
Fertilizer
You don’t need to apply any fertilizer during the winter, let the lawn rest and bring it back in March. Its okay to apply some nitrogen into November to maintain some color and a little growth but the plant will shut down once it gets too cold and the fertilizer will not benefit the plant.
If you have any questions let me know.
-Jay
Comments Off on Maintenance practices for your Arizona and California SodJul
Sod: Not Just for Your Lawn
We often talk about sod on a large scale, from athletic fields and golf courses to housing developments and private homes. But our sod has many more uses, as you’ll see.
Events
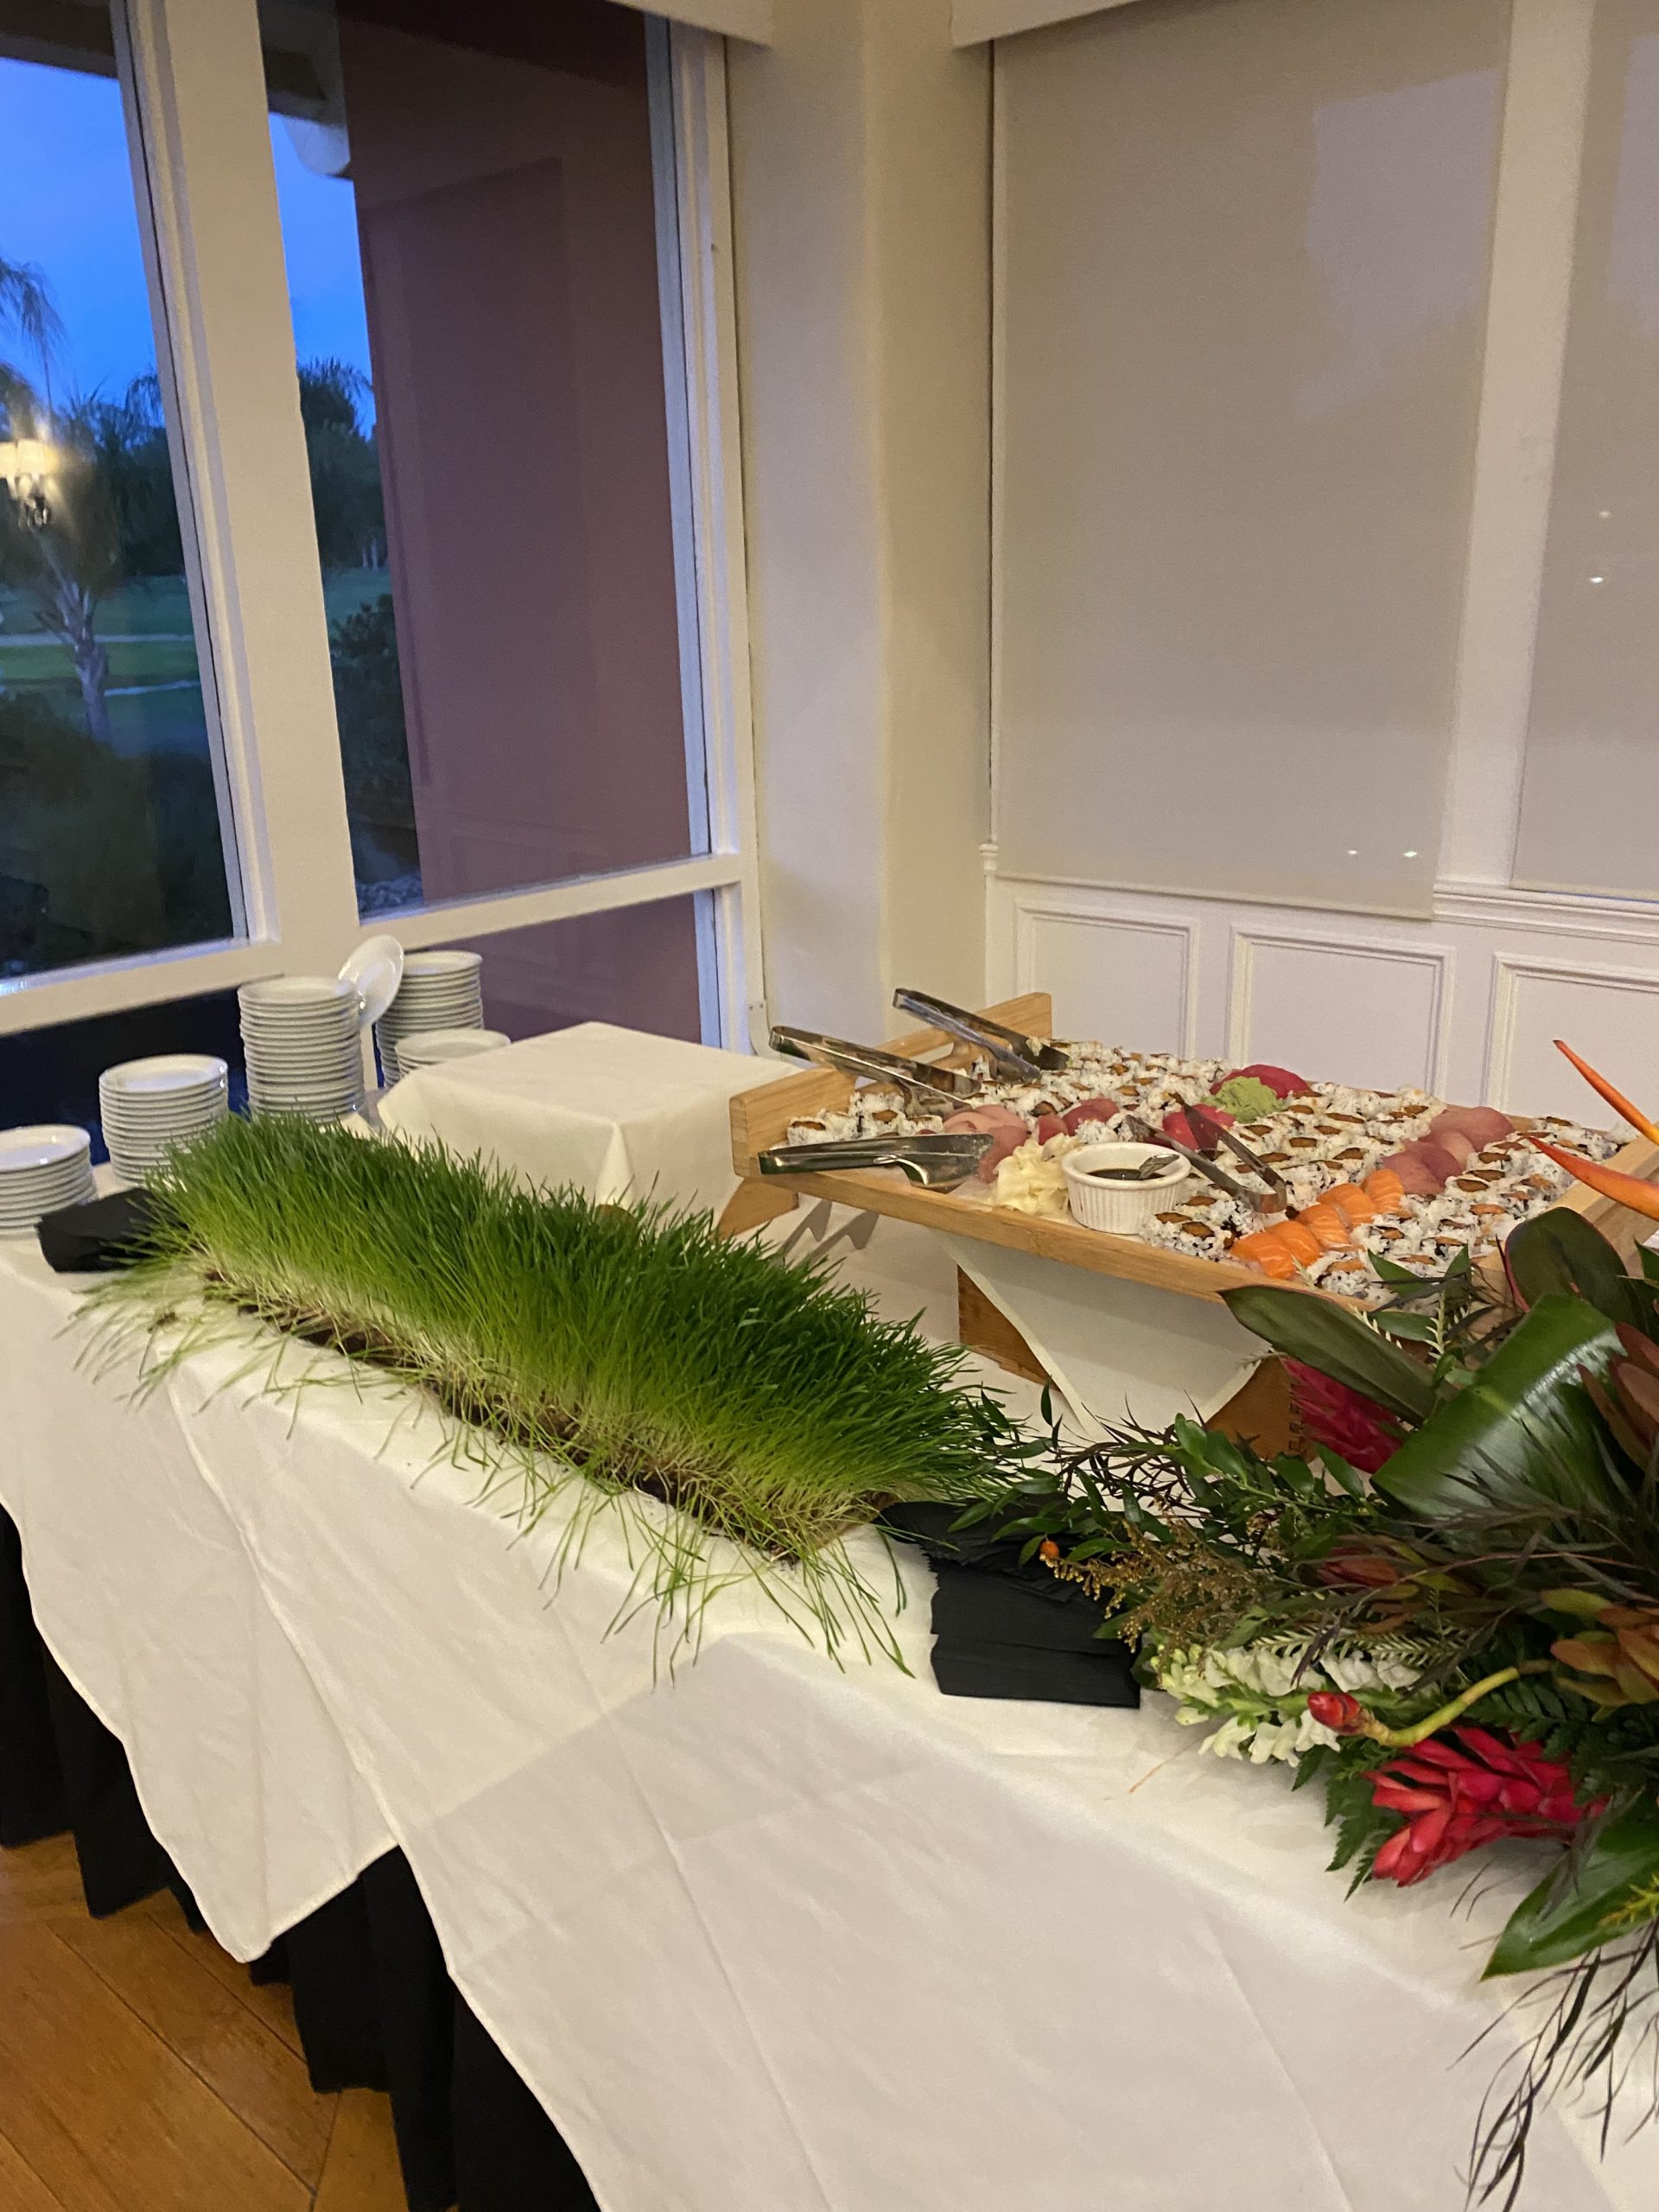 One place sod can be very useful is at events. You can lay down temporary sod for an outdoor area you’d like to soften up and give a more natural look. It looks great as decorative pieces, as well. We recently served a wedding where sod was used as a tabletop, as well as side accents.
Compost
One popular and helpful way to use sod is by creating a sod composting pile. When you take out sod to create a hard path or walkway, you will have extra and wonder how to dispose of it. The answer is not to dispose of it at all, put it to use! While the sod is still fresh, find a corner of your yard and lay down a piece of sod grass. Stack face down pieces of sod on top of that, wetting each piece before adding another. Once your composting sod pile is as high as you’d like it to be (not to exceed 6 ft), cover the it in thick black plastic. Weigh the edges down against the ground with stones or cinder blocks, making sure not to let any light to get in. Let your composting sod pile sit until the following spring and uncover it. Inside, you will find rich compost ready for use!
Gardening
Another great use for sod is creating the base for a garden or flower bed. Follow these steps to starting your new garden base! Pile the sod, grass down, in your new garden space until it reaches the desired height. Then cover it with 2–3 inches of topsoil. Finally, add 3–4 inches of mulch. This is a great way to use old sod to increase garden height for better drainage, or even build a tall, raised bed if desired. The sod slowly decomposes into rich soil which will eventually feed the plants in your garden.
Those are just a few small-scale uses of sod. Talk to us about your sod projects – large and small – and see what we can do for you! For more information, visit our website westcoastturf.com
Comments Off on Sod: Not Just for Your LawnApr
Changes in Water Restrictions in California
 We have all read an article or two lately about the need to cut back on water used outdoors for lawns, trees, and shrubs. We are in a time when water supply is low, and we are caught between trying to keep our homes cooler by having a lawn and using too much water to keep it green. There will always be two sides to this issue as some see lawns and plants as a waste of water and others understand the benefit to the environment. As is the case in politics a blog post or article is not going to change one’s mind one way or the other but being opened to change and learning from each other will help us find a middle ground. Today I am going to talk about ways to reduce water for your turfgrass while keeping the grass healthy, and still providing the benefits to the environment.
Grass selection is becoming more and more important. Let us start by examining the difference between warm and cool season grasses. Here in the southwest you can expect to use 30% more water by using a cool season grass when compared to a warm season grass. Cool season grasses grow best between 60-75 degrees whereas warm season grasses grow best between 90-105 degrees. Picking a warm season turfgrass for your area can save a significant amount of water and allow you to curtail water use longer during hot, dry periods. Swapping out a tall fescue lawn for a drought tolerant bermudagrass is much cheaper than you think and it will save water and put money back in your pocket.
The next part of grass selection is determining the right warm season grass for you. Breeders have been working overtime for years to come up with more drought tolerant grasses and they have been very successful. Some of the grasses on the market right now for reducing water are Kurapia (best drought tolerance), Tahoma 31 (second best), Tiftuf (3rd) Santa Ana, Paspalum, and Zoysia (coming soon to WCT). Kurapia is a ground cover that can be maintained on 50-60% replacement of evapotranspiration and even less if you want to slow the growth and put the grass into a state of dormancy during the hot summer. Studies have shown Tahoma 31 to use slightly less water than Tiftuf its closet competitor in the drought market and 20% less water than older bermudagrass varieties. Selecting the right turfgrass will enable your lawn to use less water and maintain drought tolerance through the hot summer.
How much water does grass need to survive? This is a loaded question, and you will get several different answers but on average 1.25” of water per week during the hottest part of the summer will keep your lawn healthy, thriving, and growing. Can you water less than 1.25” and have a good lawn? Absolutely! You could maintain your lawn with a once-a-week deep irrigation cycle during the summer months to keep the plant healthy and alive. The drought tolerant varieties will put your lawn into a state of pseudo dormancy, but the turf will still provide the same environmental benefits. I know for many having a green lawn is important but sometimes its not possible based on available water. In this situation I advise using a product like Endurant Turf Paint to give the lawn the desired color during periods of water reduction. Since the lawn will not be growing much the paint should last 45-60 days.
Raise your mowing height during the summer. The shorter you maintain your lawn, the shallower the root system will be for the plant. Most warm season grasses can be maintained between half and inch and one and a half inches. These are the optimal ranges but do not be afraid to raise the height to two inches and save even more water.
Water infiltration is extremely important. If your soil is a hard pan and water sheets off the ground every time you water, there is some work to do. Grass loves a deep watering which can happen all at once or broken up in the cycle/soak method. This means running 10-15 minutes and then letting it soak for an hour or more before running the second half of the cycle. If you cannot run more than a few minutes of water without runoff its time to aerate and open the soil. This will relieve compaction and allow water to freely get into the soil.
Irrigation systems save time, water, and money. Putting in a smart timer that calculates evapotranspiration and tests soil moisture will help keep water use down and drastically lower your budget. These smart devices calculate real time weather, plant needs, and soil data. You can set them to use 70-80% of ET to keep your lawn growing. Many cities offer free irrigation clocks and soil moisture monitor tools so check with your city and see what is available.
There are so many great options on the market right now to save water and allow you to have a healthy lawn. Remember that a lawn does not have to be bright green to be healthy. No one wants to give up their lawn and no one will have to if we all use some conservation methods. If you have any questions on any varieties send me an email and I will be happy to help you out. For more information about us, visit: westcoastturf.com
Click here for:
-Jay, Mr. Wise Grass
Comments Off on Changes in Water Restrictions in CaliforniaApr
Spring Cleaning Your Outdoor Space
The sun’s out, but it’s not too hot yet – now is the perfect time to get your home, garden, and outdoor spaces ready for spring. Here are some simple steps to getting the spring cleaning done.
- Clean, clean, clean. Wash windows and floorboards, dust off any cobwebs, sweep surfaces, and clear away any debris from fallen leaves and trees. Power wash your patio or deck. Wipe down patio furniture. Clean or replace any outdoor furniture as needed.
- Update your green spaces. Mow your grass, trim your shrubs, redefine garden beds, make sure your natural grass is healthy and in a good routine for watering and mowing. Have fun with it – add pops of color in planters and herbs to your garden for cooking.
- Aerate your lawn, if necessary. If your lawn gets heavy traffic, such as lots of running and playing in the same spot, this can cause soil compaction. A lawn aerator creates openings in lawn turf that allows water and air to penetrate the soil and reach the grassroots. You can rent a lawn aerator at a big box hardware store, or, if you have a small lawn, use a hand aerator to do it. If you must aerate in the spring, consider doing it around Memorial Day, after weeds have started growing but before they go to seed.
- Weed your lawn. If you prefer weed-free lawns, spring lawn care is as much about weed prevention as it is about fostering healthy lawn growth. Depending upon whether a weed is annual or perennial, you will use either a pre-emergent herbicide or a post-emergent herbicide.
- Service your lawn mower. Spring means it’s time to get out the lawn mower and make sure it’s in working order. Start it up – stubborn start-ups are a sign that it might be due for a tune-up (mowers should be given tune-ups once a year). If your lawnmower needs more than a tune-up, then consider getting a new one. Among the key tune-up tasks is sharpening the mower blade. A regular sharpening will ensure the blade severs, rather than tears, the grass, leading to a nice green lawn rather than one with ragged brown tips.
Once your outdoor space is ready, get outside and enjoy this beautiful spring weather! For more information visit https://www.westcoastturf.com
Comments Off on Spring Cleaning Your Outdoor SpaceMar
When Should I Start to Spring Transition My Lawn to Bermudagrass?
I’d like to go over some common questions I have received through the blog in the last few weeks and see if it can help others with some of the same concerns. I always encourage everyone to send over your lawn questions and I will get back to you as soon as I can.
When should I start to transition my lawn back to bermudagrass?
I always recommend starting the process slowly in March and ramping up in April so your lawn has transitioned by May. I know that was a mouth full, but the truth is it’s not a short process unless you chemically transition your lawn. In March its ideal to start to gradually lower your mowing height and remove some of the turf canopy. This is not a scalp, this is lowering the height so the bermudagrass can breathe and get some sunlight. By mid-March you should be mowing two times per week and starting to see some thinning in the ryegrass. By thinning I mean bermudagrass leaves are starting to show between the ryegrass blades. Currently there is no need to fertilize the ryegrass, its time to back off on nutrition until bermudagrass season. In early April you can lightly verticut or even lightly power rake the lawn to remove some of the ryegrass giving way to bermudagrass. The more sunlight you can get in the grass, the faster you will transition. If the ryegrass remains extremely thick and lush you can expect it to provide excessive spring shade slowing down the bermudagrass. When soil temperatures reach 64 degrees (around April 15th) go ahead and apply ammonium sulfate 21-0-0 at 5 pounds per 1000 SF to jump start your bermudagrass. Continue mowing two times per week and gradually lowering your heights until you see the bermudagrass take over.
Spring Transition, keep lowering the height…..
Can I still put down pre-emergent for broadleaves?
Most of the grassy weeds and broadleaves are now germinating so putting down the preemergent will not yield the results you’re looking for. At this juncture its best to spot spray weeds depending on the type. Make sure the product is labeled for the weed you’re trying to control and can safely be used on bermudagrass. Grassy weeds use different chemicals than broadleaves and not all chemicals are safe and effective so check with specialty stores for better products.
What can I do to repair the urine damage from my dogs? Read the rest of this entry »
Comments Off on When Should I Start to Spring Transition My Lawn to Bermudagrass?